The checkbook filter allows you to sort the transactions in the register.
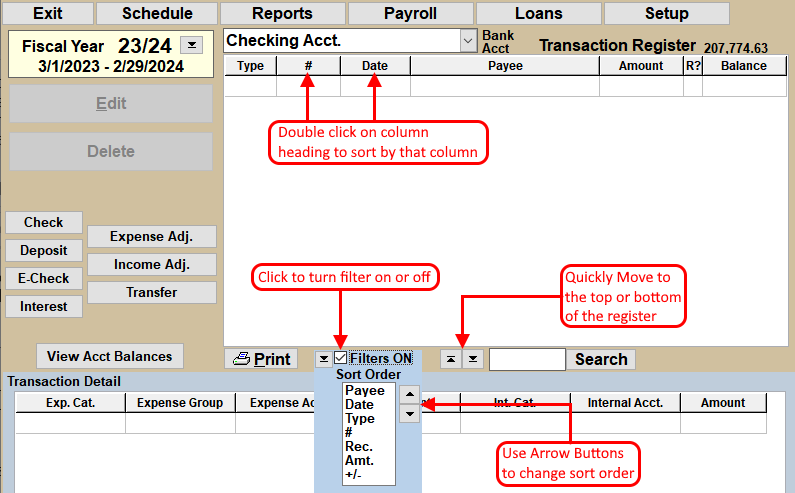
- Locate the Filters checkbox. Depending on your screen setup, the filters check box can be found either below the Transfer button or at the bottom of the transaction register, to the left of the Search button". If you have NTS version 4.40 or below, the check box will be located just below the Fiscal year button on the checkbook screen.
- Click the Filters check box and a green box appear with a "Sort Order" list.
-
Select the sort order. Transactions in the register will be sorted by the options listed. In
the example below, items are listed first by payee name, then by the Reconciled column, then by
date ... etc. You can change the order of the sort criteria by moving the a sort option up or
down in the list. Click on the sort option to select it, and then click the
 or
or  button to
move the option up or down.
button to
move the option up or down. - Set the ascending/descending option. Notice the ">" in front of Payee and Date. This indicates that the payees are in descending order. The same is true for the date. To change from ascending to descending order and back again, double click on sort option in the list.
- To sort the transactions by a particular column, simply double-click on the column heading (or name, i.e.: Payee, Amount, etc.) to sort the transaction by that column.
After setting the sort filters, use the top and bottom buttons to go to either the top or bottom of the register. See the illustration below.
When turning the filters off or exiting the Checkbook, filter settings are automatically saved. When turning on the filters again, the last filter settings will be loaded again.
There is a short cut to turn on filters for reconciling your checkbook. These filter settings will make it easier to reconcile your checkbook. See the link below for instructions.
For more information see: