These instructions are for printing envelopes or mailing labels directly from the check register.
Print Mailing Labels
-
In the register, click on the check for which a label needs to be printed. Click the
 button below the transaction register.
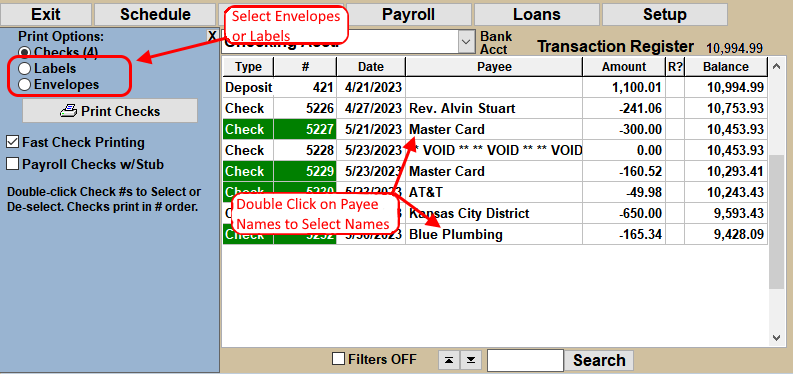
 - A print selection box will appear on the left side of the screen. In the print selection box, click on "Labels".
- If labels are needed for a range of checks, double click on the last check number in the range. All checks with numbers between the first and last check number clicked will be selected for printing. See the illustration below.
-
Select or deselect checks individually by double clicking on the payee name. When all the checks
have been selected, click the
 button in the
green print options box.
button in the
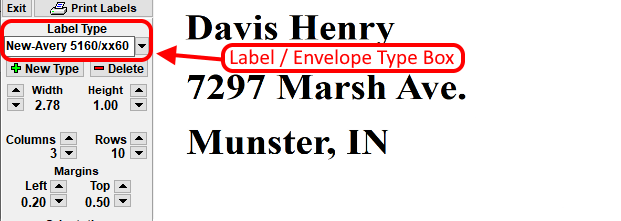
green print options box. - There are 4 built in label formats. Avery 5260 and 5261. The 5260 setting will work with labels that are 1" × 2 & 5/8" on a standard size page with 30 labels per page. The 5261 setting will work with labels that are 1" × 4" on a standard size page with 20 labels per page. The other 2 settings 3 wide × 10 high and 2 wide × 10 high, are for general labels that cover an entire page. Choose the setting that best fits your labels from the Label type box. See the illustration below.
-
Click to print the labels.
- A Save Changes box may appear when leaving the print screen.. Click OK to save any changes that may have been made. When printing labels again, the saved settings will automatically be selected.
Print Envelopes
-
In the register, click on the check for which an envelope needs to be printed. Click the
button below the transaction register.
- A print selection box will appear on the left side of the screen. In the print selection box, click "Envelopes".
- If envelopes are needed for a range of checks, double click on the last check number in the range. All checks with numbers between the first and last check number clicked will be selected for printing. See the illustration below.
-
Select or deselect checks individually by double clicking on the payee name. When all the checks
have been selected, click the
 button
in the green print options box.
button
in the green print options box. - There are 2 built in envelope formats: #10 and #10-HP printer. Both of these settings are for #10 size envelopes. With most printers, you should select the #10 setting. If nothing prints on the envelope or if you have a HP printer, choose #10-HP printer. Choose the setting from the Form type box. See the illustration below.
-
Click to print the envelopes.
- A Save Changes box may appear when leaving the print screen.. Click OK to save any changes that may have been made. When printing envelopes again, the saved settings will automatically be selected.
Select Payees for printing Envelopes/Labels
Select Envelope/Label format