The Expense Planner can assist in planning the Expense Account and Budgets for the next Fiscal Year
before actually transitioning to the new year.
- From the Checkbook screen, click SETUP and then select EXPENSE ACCT LIST.
- Click the
 button
 - Click SETUP/VIEW NEXT YR EXPENSE PLANNER LIST
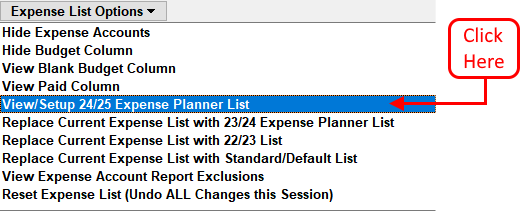
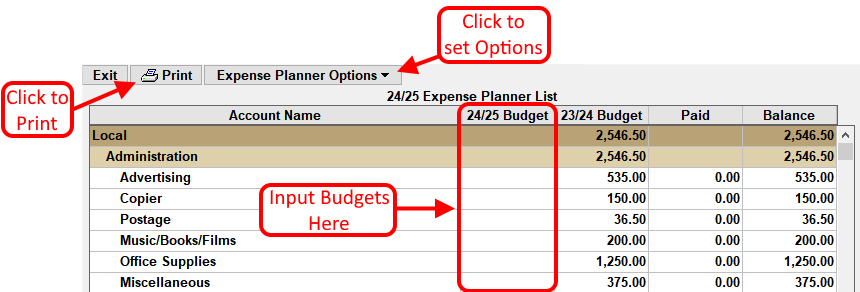
- The Expense Planner will be displayed showing the Current Year Budget, Total Paid, and Budget Balance columns(Right-Most 3 Columns) along with the Proposed Budget for the Next Fiscal Year(Column #2).
- Enter the Next Fiscal Year Budgets in the column to the RIGHT of the Expense Acct Name(Column #2-white lines/rows). Category and Group totals will automatically be calculated.(brown/tan lines)
- To ADD a NEW Account/Group/Category:
- Click the + ADD LINE button.
- Click NEW ACCOUNT, NEW GROUP or NEW CATEGORY
- The NEW ACCOUNT/GROUP/CATEGORY line will be added to the list.
- If adding an Expense ACCOUNT, then optionally enter a Budget Amount in the BUDGET column or leave $0.00. Budget Amounts cannot be entered for Expense Groups or Categories since the TOTAL of all Account Budgets will be automatically tallied and listed.
- To change the Position/Order of any Line, Click and Drag the Line up or down the List and Drop at the desired position.
- To EDIT an Expense Line:
- Click on the Line to be modified.
- Make changes to the Name or Budget(if an Expense Account).
- To DELETE an Expense Line:
- Click on the LINE in the list.
- Click the - DELETE button on the right side of the Expense List.
- To PRINT the Expense Planner List:
- Click the
 button.
 - Select the Font Size and Print Options
- Click the button again.
- Click the
- Expense Planner Options: Click this button to view more options:
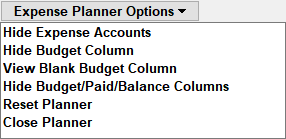
- View Full Planner: Views the entire Expense Planner List
- View w/Blank Budgets Only: View the List of Accounts with a Blank Budget Column
- View Expense Accounts: View with the Expense Accounts(white lines)
- Hide Expense Accounts: View only Categories and Groups/Sub-Categories
- Reset Planner This will put the Planner List back to the default state and erase any changes that have been made.
- Close Planner The Planner will be saved and closed and then the screen will display the Expense Account List for the selected Fiscal Year.
- To Move/Reposition a Line: Click and Drag the Line up or down the List and Drop at the desired position.
After transitioning to the new Fiscal Year, you may need to be REPLACE the existing Expense Account List with the Expense Planner that was setup in the Prior Fiscal Year.
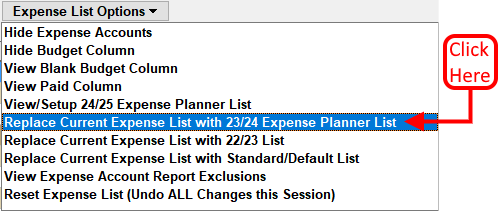
To REPLACE the existing Expense Account List with the Expense Planner List setup in the Prior Fiscal Year:
- Click the button at the top of the screen
- Click REPLACE LIST WITH xx/xx EXPENSE PLANNER LIST
NOTE: The Expense Planner List can only Replace the existing Expense List if ALL transactions that have already been Posted have a corresponding Expense Account.