- From the main payroll screen, click on Setup.
- To add a new employee, click the Add New Employee button in the bottom right corner of the window.
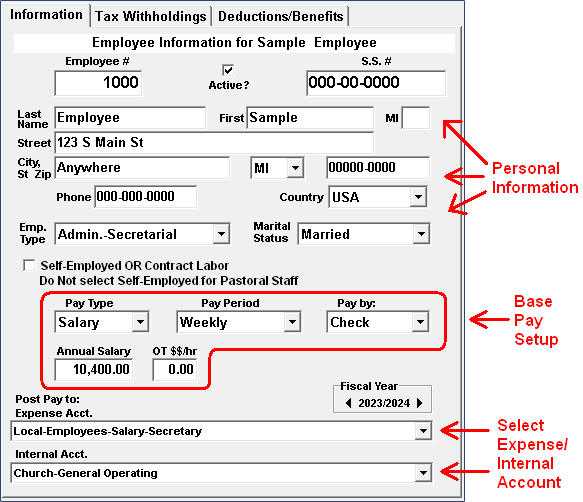
- Type in an employee number. This number should be unique for each employee.
- Fill in all the employee's personal information on the yellow information page; name, social security number, address, and phone number.
- Below the address, you will find the Employee Type selection box. Select the employee type from the list.
- Select the employee's marital status.
- Check the Self-Employed OR Contract Labor box for anyone who will NOT receive a W-2 including self-employed or contract labors. Do NOT mark this box for any pastors on staff at the church. This box can be checked for supply pastors.
- Select the Pay type from the selection box; Salary, Hourly, Contract or Other.
- Select the pay frequency: Weekly, 2 Weeks, Bi-Monthly, Monthly, Yearly or Contract. See the illustration below NOTE: If the employee is paid twice a month (example, paid on the 15th and 30th), select Bi-Monthly.
- If the employee is paid by the hour, type in their hourly pay into the Hourly $ box and then the over time rate. If an overtime rate does not apply, leave the amount as $0.00. If the employee is salary, enter in their Annual Salary in the Salary box. Leave the overtime amount $0.00 since it does not apply for salary employees.
- For employees that are paid using direct deposit, select E-Check (electronic check) in the "Pay by" box. Otherwise, the leave the Pay by setting as Check.
-
Select the expense account and internal account for this employee's salary. In most cases, the
internal account will be the Church - General Operating account. The expense account will
generally correspond to the type of employee or employee's position.
Each time a payroll check is generated, the expense and internal accounts will be charged for the Employee's Gross Pay amount.