
In order to import Contribution information, you will first need to create a CSV data file containing this
information. If you are wanting to
import from an Online Donations Platform, then use their EXPORT or REPORT option to create this file.
Make sure to Save the file to a familiar Location on your computer (ie. the DOCUMENTS folder). You can also
create a CSV data file by selecting the EXPORT option on the Contributions DETAIL REPORT screen. You will need a
minimum of 3 columns of information in this file: NAME, DATE, AMOUNT. Other columns that could be imported are:
FUND, SERVICE, FEE, TYPE, #, INCOME EXEMPTION, COMMENT. The Contributions import process will not overwrite or
delete any existing entries, but will MERGE the imported data with the existing data.
To use the Contribution Import feature:
- Select the SERVICE for imported donations(optional)
This is the SERVICE that will be used for the imported data unless the Service is specified in the Import file.

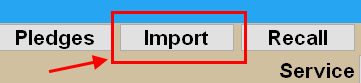
- Click the IMPORT button
- Select the import FILE from the File selection box then click OK. (this box may take up to 10-15 seconds to appear)
- The Import summary will appear next. Make Note of the STATUS column on each line of data:
- PENDING This line is ready to be posted although changes could be made prior to posting.
- CANCEL The user has chosen to skip this line of data and it will not be posted.
- DUPLICATE This line of data appears to be a duplicate entry for one that already exists for this Donor and will not be posted.
- ERROR This line has missing or erroneous data that must be corrected before it could be posted.
- POSTED This line of data has been successfully posted into the Donations register.

- To change PENDING/CANCEL/DUPLICATE Status: Click inside the STATUS column and select the desired Status from the menu.
- To make corrections to an ERROR status line: Click on a RED box on the line and make necessary changes.(see below)
- To make Changes to Data: Do one or more of the following:
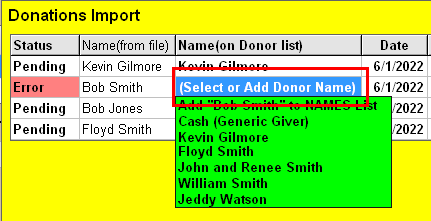
- Select a Donor Name: Click in the NAME(ON DONOR LIST) column and select the Donor name to use for this line of data.
For example: if the Import file lists the Donor as "Bill Smith" and the NTS Donor name list has him listed as "William Smith", then select "William Smith" in this column. You will be prompted to use "William Smith" in the future when the Import file lists "Bill Smith" as the Donor. Select OK if you want to do that.
If you would rather ADD the Donor name to the NTS Donor Name List,(because there is not a corresponding name there), then choose the ADD TO NAMES LIST option.
- Specify Donation Date: Click the Date to make changes. Select the desired Date on the Popup calendar.
- Select a Fund: Click in the FUND(ON FUND LIST) column and select the Fund name to use for this line of data. If you want to add the Fund name to the Fund list, then choose the ADD TO FUND LIST option.
- Specify the Donation Amount: Click the Amount column and make any necessary changes.
- Specify the Fee Amount:(optional) Click the Fee column and make any necessary changes.
- Select the Transaction Type: Click in the TYPE column and select from the Menu.
- Specify the Transaction #:(optional) Click the # column and make any necessary changes. This is typically used for CHECK #.
- Select a Service: Click in the SERVICE column and select the Service name to use for this line of data.
- Specify if Income Exempt:(optional) Double-Click inside column to change the Exempt status.
- Specify Comment:(optional) Type a Comment into this column if needed. Import files may contain unnecessarliy long Comments. Shorten or delete these before Posting.
- Select a Donor Name: Click in the NAME(ON DONOR LIST) column and select the Donor name to use for this line of data.
- To POST donations: Click the POST PENDING DONATIONS button. This will post all lines with the PENDING status.
After Posting, the status will change to POSTED.

- To Print: Click the Printer icon in the upper-right to print the list of Imported donations.
- To Close the Import window: Click the X button in the upper-right corner.
VIEW Features: Click the VIEW button in the upper-right area to access the following features:
- File Data: The raw file data will appear in a table format. The information on this screen can be modified/corrected.
- Name Links: A list of the Import File Donor Names that have been linked to a specific NTS Donor Name will appear. To delete a Link, click on the Link and then press the DELETE button on the computer keyboard.
- Fund Links: A list of the Import File Funds that have been linked to a specific NTS Fund will appear. To delete a Link, click on the Link and then press the DELETE button on the computer keyboard.