- From the Contribution screen, click on Reports and then Receipts.
-
Click the
 button, next to the Exit button.
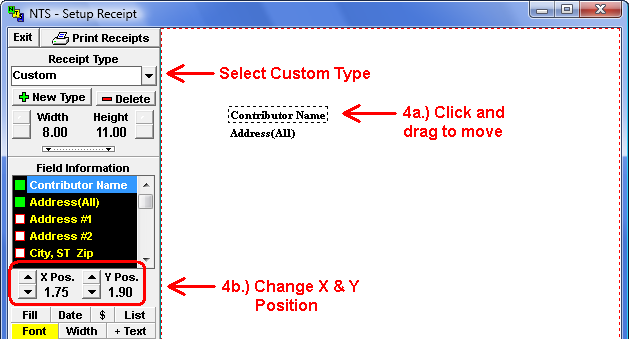
- In the Receipt Type box, choose Custom. See the illustration below.
- In NTS version 5.90 and above, the church name and address can be printed more than once. To turn on one of these options, double click on the Church Name(2) or Address(2) in the Field Information list (black list on left side of screen.)
-
On the setup screen, the position of the Church Name, church mailing address, church phone,
Contributor name and contributor address will visible. The position of the these items and the
additional items selected above can be moved in 2 ways. (For NTS versions 5.22 and below, only
the contributor name and address can be moved.)
- Click and drag the lines on the screen to move them in the print preview area.
-
Change the X and Y position settings:
- Click on the line of information you need to move. A dashed box will appear around the text to indicate it is selected.
- Find the X and Y position settings on the side bar. See the illustration below.
- The X and Y position settings are in inches. The X position is the distance from the top of the page to the start of the line. The Y position is the distance from the left side of the page to the start of the line. Measure the distance from the top and left side of the page for the Name.
-
Change the X and Y positions by clicking the
 or
or
 buttons. Clicking the buttons with the
LEFT mouse button will change the position by ± 0.05 inches. Clicking the buttons
with the RIGHT mouse button will change the position by ± 0.01 inches.
buttons. Clicking the buttons with the
LEFT mouse button will change the position by ± 0.05 inches. Clicking the buttons
with the RIGHT mouse button will change the position by ± 0.01 inches.
- Position each item on the screen that needs to be moved.
- After making the necessary changes, click the Exit button. The setup screen will close, and a pop-up box will appear asking if the changes should be saved. Click OK to save the changes.